
Magesh Ravi
Artist | Techie | Entrepreneur
Magesh Ravi
Artist | Techie | Entrepreneur
I recently switched over to XFCE from GNOME and have become an XFCE evangelist since then. I have done more than half a dozen Xubuntu 18.04 installations within the past 6 months, and have built up a standard set of post-installation steps. Here are a few noteworthy apps from my check-list.
Git is the most popular version control system available today. If you are on Linux, you must have git installed.
sudo apt install git
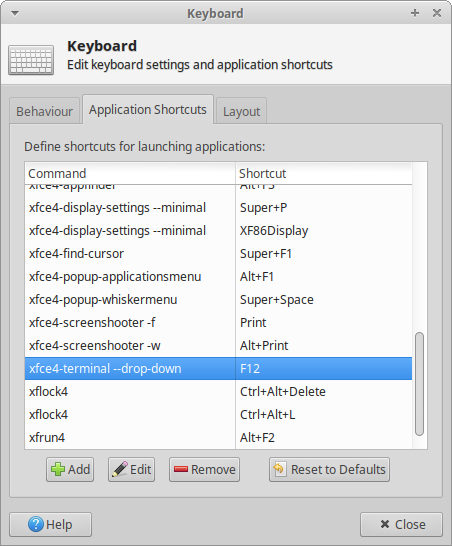
The Xfce terminal has a drop-down mode built-in and can be triggered with a keyboard shortcut. To configure the drop-down mode, go to Settings > Keyboard > Application Shortcuts. Then, click on Add and use the following command.
xfce4-terminal --drop-down
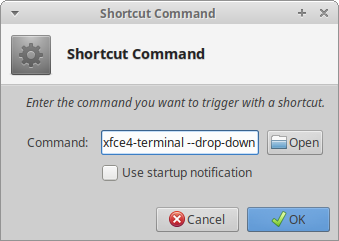
You'll be prompted to assign a keyboard shortcut for this command. I use F12 key for this purpose, but you are free to choose any key that suits you. After specifying the key, you will see the shortcut listed as shown below.
Bonus tip: Try remapping the whisker menu shortcut to Super+Space. It feels a lot more convenient than Ctrl+Esc.
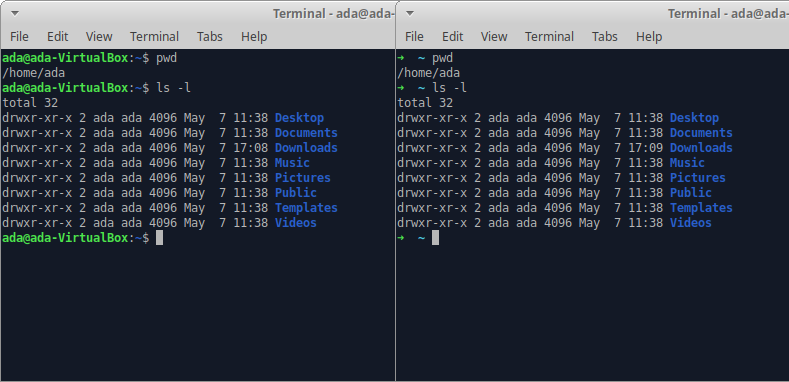
I love the Xfce terminal in dropdown mode. But sometimes, I like to use split panes instead of tabbed windows. Terminator is a great emulator for such use cases. Don't forget to check out its other cool features. Install terminator using the command,
sudo apt install terminator
Zsh is an interactive shell that offers superior command line auto-completion in your terminal. Hundreds of plugins like git, docker, docker-compose, etc. make your life easier as a developer.
# install zsh
sudo apt install zsh

# verify installation
zsh --version

# make zsh your default shell
chsh -s $(which zsh)
Logout and log back in again.
# test if zsh is your default shell
echo $SHELL

# check version
$SHELL --version
Oh My Zsh is an open source framework for managing your zsh configuration. You could configure your zsh yourself. But I suggest using Oh My Zsh as a starting point and build on top of that.
# install oh-my-zsh
sh -c "$(curl -fsSL https://raw.githubusercontent.com/robbyrussell/oh-my-zsh/master/tools/install.sh)"
Oh My Zsh comes with loads of bundled plugins. You can check the wiki to see what's currently available. To use a plugin, you'll have to enable it in the .zshrc file usually located in your $HOME folder. Open it with your favourite text editor.
nano ~/.zshrc
Here is a sample plugin configuration.
plugins=(
  git
  docker
  docker-compose
)
This plugin suggests commands as you type, based on your command history. It's fast and is one of the best plugins that is not bundled with oh-my-zsh.
Clone the repository into $ZSH_CUSTOM/plugins (by default ~/.oh-my-zsh/custom/plugins)
git clone https://github.com/zsh-users/zsh-autosuggestions ${ZSH_CUSTOM:-~/.oh-my-zsh/custom}/plugins/zsh-autosuggestions
Then add the plugin to the list of plugins inside .zshrc.
plugins=(
  git
  django
  docker
  docker-compose
  dotenv
  zsh-autosuggestions
)
It's time to pick a good theme for the terminal. In spite of a huge collection of themes bundled with Oh-My-Zsh, I use powerline-shell.
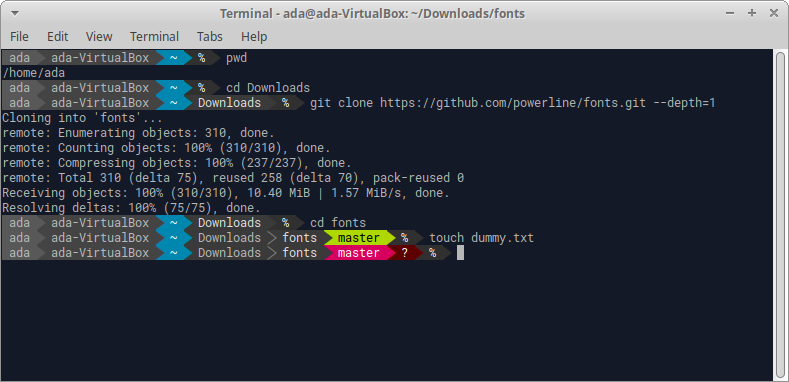
First, install powerline-fonts necessary for displaying the glyphs.
# clone
git clone https://github.com/powerline/fonts.git --depth=1

# install
cd fonts
./install.sh

# clean-up a bit
cd ..
rm -rf fonts
Then, install pip
sudo apt install python3-pip
Finally, the pip package
pip3 install powerline-shell
Add powerline-shell to your .zshrc file.
function powerline_precmd() {
    PS1="$(~/.local/bin/powerline-shell --shell zsh $?)"
}

function install_powerline_precmd() {
  for s in "${precmd_functions[@]}"; do
    if [ "$s" = "powerline_precmd" ]; then
      return
    fi
  done
  precmd_functions+=(powerline_precmd)
}

if [ "$TERM" != "linux" ]; then
    install_powerline_precmd
fi
To see the changes, close all your terminal sessions and open a new one. Alternatively, you can reload the .zshrc file in your current terminal.
source ~/.zshrc
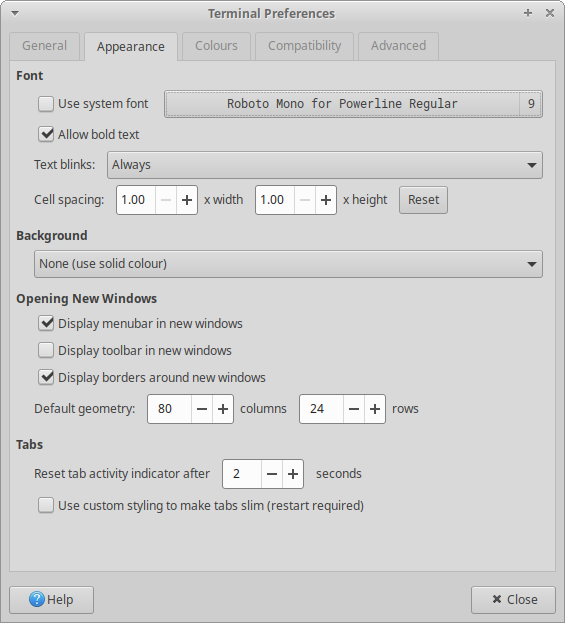
You will see broken fonts in between. Make use of the installed powerline-fonts to fix this issue. In your Terminal, go to Edit > Preferences > Appearance. Under Fonts, uncheck the "Use system fonts" option and select one of the powerline patched fonts. I use Roboto Mono for Powerline Regular.
Now everything should look fine.
Powerline-shell offers a decent amount of customisation. You can generate a default config file at a specific location using the commands below.
mkdir -p ~/.config/powerline-shell && \
~/.local/bin/powerline-shell --generate-config > ~/.config/powerline-shell/config.json
Use your favourite text editor to edit this file. The below configuration works well for me.
{
 "segments": [
    "virtual_env",
    "username",
    "hostname",
    "ssh",
    "cwd",
    "git",
    "hg",
    "jobs",
    "newline",
    "root"
  ],
  "cwd": {
    "mode": "dironly",
    "max_depth": 1
  }
}
Ligatures make your code look legible and a lot cooler. Read more about monospaced programming fonts with ligatures here.
sudo apt install fonts-firacode
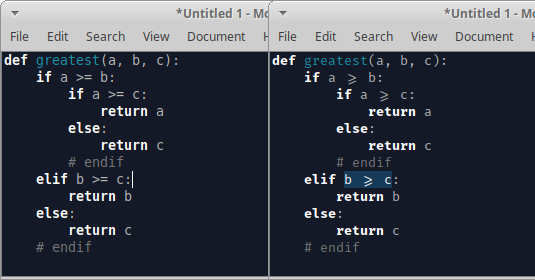
Python code without ligatures (left) and with ligatures (right)
TypeCatcher is a linux desktop client for Google Webfonts. You can search, browse and download Google fonts to your system with a click.
sudo apt install typecatcher
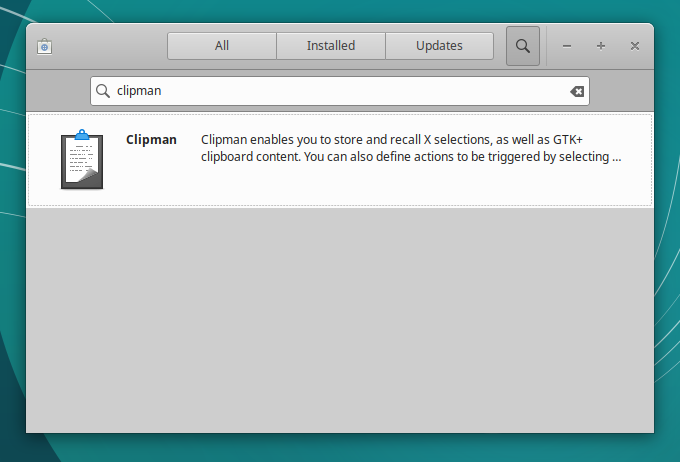
Clipman is a lightweight clipboard manager that works well with XFCE. Install it from the software center.
You will have to manually assign a keyboard shortcut for Clipman. To do this, open Settings > Keyboard > Application Shortcuts. Then click on Add and use the following command.
xfce4-popup-clipman
Then, press the keyboard shortcut you wish to use. I prefer Ctrl + Alt + H.
SafeEyes is a break reminder that helps prevent eye strain. It is fairly customisable and is a must have if you often get lost in time staring at your monitor.
sudo add-apt-repository ppa:slgobinath/safeeyes
sudo apt update
sudo apt install safeeyes
I like the default Greybird theme. But it is heavily criticised by some people for looking like windows 98. If you'd like to try something more modern yet beautiful, then try the arc-theme.
sudo apt install arc-theme
In addition, install the arc-icon-theme.
# add moka ppa
sudo add-apt-repository -u ppa:snwh/ppa

# install base icon themes
sudo apt-get install moka-icon-theme faba-icon-theme faba-mono-icons

# install arc-icon-theme
git clone https://github.com/horst3180/arc-icon-theme --depth 1 && cd arc-icon-theme
sudo cp -r Arc /usr/share/icons
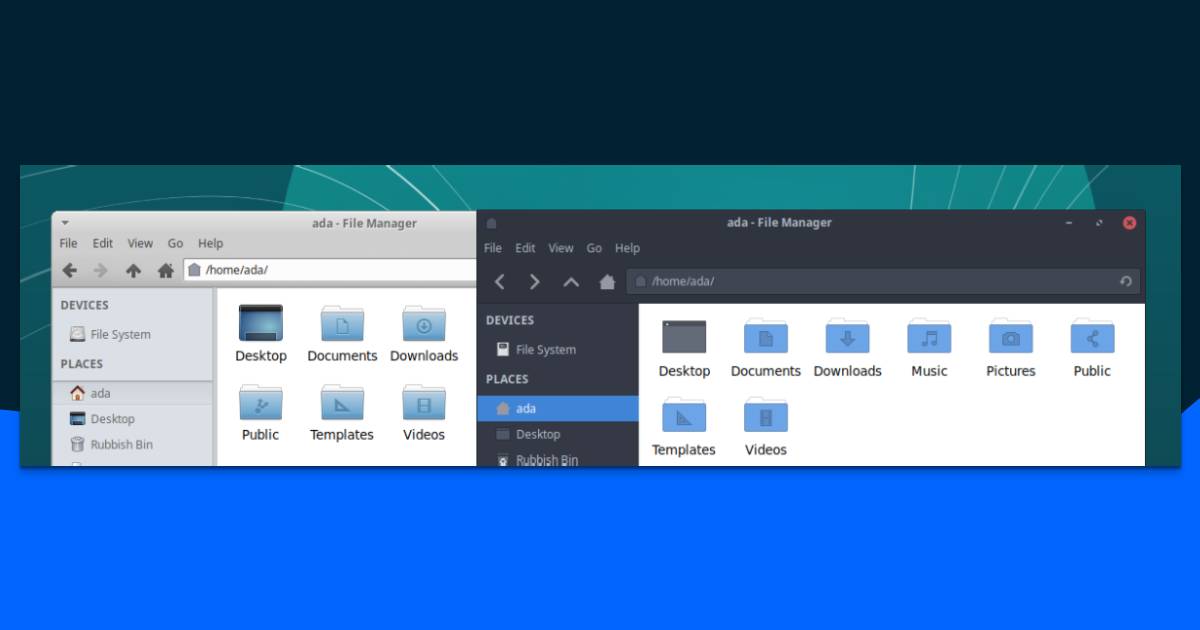
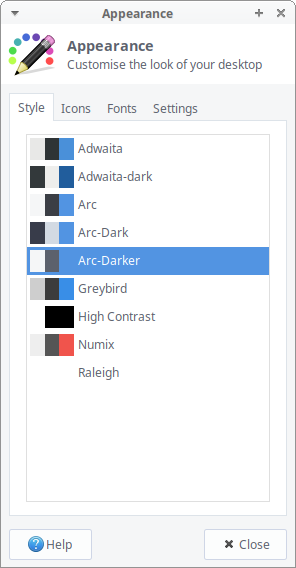
Go to Settings > Appearance > Style and select Arc-Darker. Then, switch to the Icons tab and select Arc.
![]()
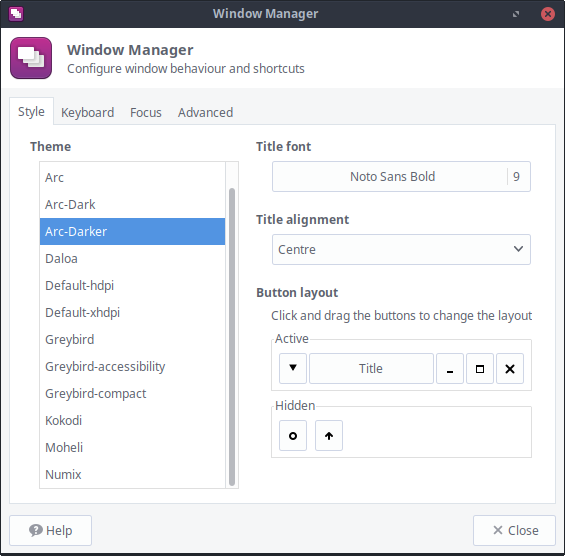
Go to Settings > Window manager > Style and select Arc-Darker.
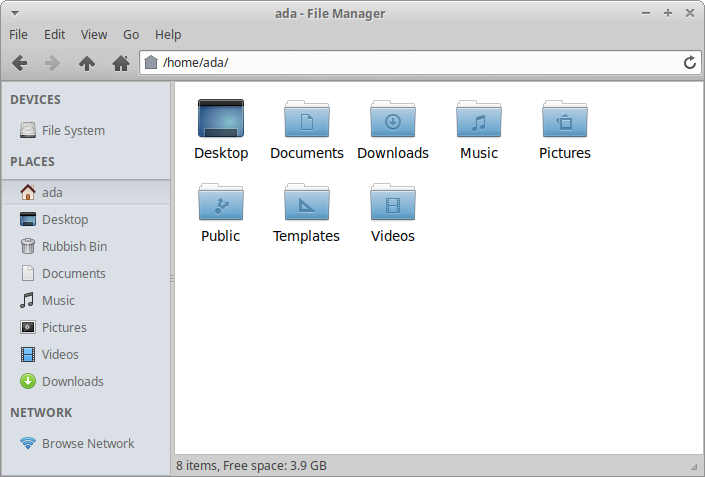
Thunar File Manager (Greybird theme)
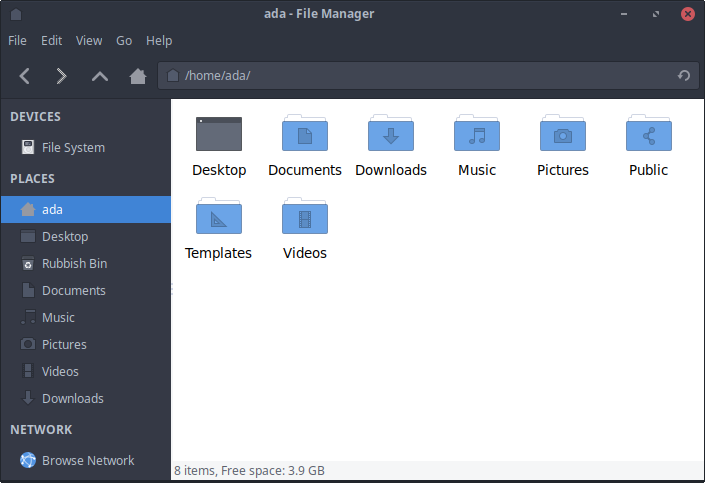
Thunar File Manager (Arc Darker theme)
That's it. Enjoy your new theme and your Xubuntu installation :)